Kuwahara Filter in C#

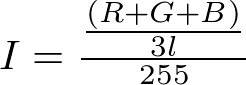
The Kuwahara filter is probably one of those things that you haven’t heard of much, if ever. It’s a noise reduction/blurring technique for images that preserves edges, similar to a median filter. It acts like a box blur, except we take that box around the center pixel and divide that into four smaller boxes (with some overlap since the number of items in the box is usually odd along the x and y axis). These smaller boxes are calculated in the same fashion as the box blur for the average value. While we’re doing that, we’re also performing another step: Finding the variance for the box. We want to know which box has the least amount of variance. The variance can be calculated in a number of ways but the easiest is simply finding the minimum and maximum values (for r, g and b) for a box and subtracting the min from the max.

public static Bitmap KuwaharaBlur(Bitmap Image, int Size)
{
    System.Drawing.Bitmap TempBitmap = Image;
    System.Drawing.Bitmap NewBitmap = new System.Drawing.Bitmap(TempBitmap.Width, TempBitmap.Height);
    System.Drawing.Graphics NewGraphics = System.Drawing.Graphics.FromImage(NewBitmap);
    NewGraphics.DrawImage(TempBitmap, new System.Drawing.Rectangle(0, 0, TempBitmap.Width, TempBitmap.Height), new System.Drawing.Rectangle(0, 0, TempBitmap.Width, TempBitmap.Height), System.Drawing.GraphicsUnit.Pixel);
    NewGraphics.Dispose();
    Random TempRandom = new Random();
    int[] ApetureMinX = { -(Size / 2), 0, -(Size / 2), 0 };
    int[] ApetureMaxX = { 0, (Size / 2), 0, (Size / 2) };
    int[] ApetureMinY = { -(Size / 2), -(Size / 2), 0, 0 };
    int[] ApetureMaxY = { 0, 0, (Size / 2), (Size / 2) };
    for (int x = 0; x < NewBitmap.Width; ++x)
    {
        for (int y = 0; y < NewBitmap.Height; ++y)
        {
            int[] RValues = { 0, 0, 0, 0 };
            int[] GValues = { 0, 0, 0, 0 };
            int[] BValues = { 0, 0, 0, 0 };
            int[] NumPixels = { 0, 0, 0, 0 };
            int[] MaxRValue = { 0, 0, 0, 0 };
            int[] MaxGValue = { 0, 0, 0, 0 };
            int[] MaxBValue = { 0, 0, 0, 0 };
            int[] MinRValue = { 255, 255, 255, 255 };
            int[] MinGValue = { 255, 255, 255, 255 };
            int[] MinBValue = { 255, 255, 255, 255 };
            for (int i = 0; i < 4; ++i)
            {
                for (int x2 = ApetureMinX[i]; x2 < ApetureMaxX[i]; ++x2)
                {
                    int TempX = x + x2;
                    if (TempX >= 0 && TempX < NewBitmap.Width)
                    {
                        for (int y2 = ApetureMinY[i]; y2 < ApetureMaxY[i]; ++y2)
                        {
                            int TempY = y + y2;
                            if (TempY >= 0 && TempY < NewBitmap.Height)
                            {
                                Color TempColor = TempBitmap.GetPixel(TempX, TempY);
                                RValues[i] += TempColor.R;
                                GValues[i] += TempColor.G;
                                BValues[i] += TempColor.B;
                                if (TempColor.R > MaxRValue[i])
                                {
                                    MaxRValue[i] = TempColor.R;
                                }
                                else if (TempColor.R < MinRValue[i])
                                {
                                    MinRValue[i] = TempColor.R;
                                }
 
                                if (TempColor.G > MaxGValue[i])
                                {
                                    MaxGValue[i] = TempColor.G;
                                }
                                else if (TempColor.G < MinGValue[i])
                                {
                                    MinGValue[i] = TempColor.G;
                                }
 
                                if (TempColor.B > MaxBValue[i])
                                {
                                    MaxBValue[i] = TempColor.B;
                                }
                                else if (TempColor.B < MinBValue[i])
                                {
                                    MinBValue[i] = TempColor.B;
                                }
                                ++NumPixels[i];
                            }
                        }
                    }
                }
            }
            int j = 0;
            int MinDifference = 10000;
            for (int i = 0; i < 4; ++i)
            {
                int CurrentDifference = (MaxRValue[i] - MinRValue[i]) + (MaxGValue[i] - MinGValue[i]) + (MaxBValue[i] - MinBValue[i]);
                if (CurrentDifference < MinDifference && NumPixels[i] > 0)
                {
                    j = i;
                    MinDifference = CurrentDifference;
                }
            }
 
            Color MeanPixel = Color.FromArgb(RValues[j] / NumPixels[j],
                GValues[j] / NumPixels[j],
                BValues[j] / NumPixels[j]);
            NewBitmap.SetPixel(x, y, MeanPixel);
        }
    }
    return NewBitmap;
}

The code above takes in an image as well as the size that you want the aperture to be. In turn it gives you a smoothed image. This filter technique is quite different from other blur filters as it produces a lot more stylized look. Hopefully this helps you out in some way.

Craigslist Monitor using Ruby

Overview

To add to my ever expanding knowledge base of languages, I decided to spend the last day and a half teaching myself Ruby and this was the result. A script to watch Craigslist for relevant posts so you don’t have to. My first ever Ruby program.

Watching Craigslist can be a time-consuming task. The script automates searching for housing, sales, services, jobs, and gigs, and emails you when it find something that matches your search criteria. It also works across multiple cities, since it’s controlled by the RSS feeds you configure it with.

Approach

Instead of sending Craigslist a server-side query, I decided to just get the RSS feed and filter the results on the client-side. There are two advantages of this — server changes don’t break the code and you can watch other feeds in a similar way (e.g. eBay).

Configuration

Edit the monitor.yml file to your liking. It should look something like this:

---
feeds:
  - http://sfbay.craigslist.org/wri/index.rss
  - http://sandiego.craigslist.org/wri/index.rss
include: software, developer, computer, programmer
exclude: freelance, internship, supplement, contract
email_to: someone@gmail.com
email_from:
  address: smtp.gmail.com
  port: 587
  user_name: 'a_username'
  password: 'a_password'

Running

clockwork monitor.rb

That’s it. if you want to log the output:

clockwork monitor.rb > monitor.log

Press CTRL+C to exit

Downloads

CLMonitor.zip 19 Sep 2014 3 KB

Update Status

I’m attempting to upload the backlog of code I have on my harddrive as quickly as I can. I’m also running into issues moving some web applications over to the new server, which is producing some unexpected errors. Please be patient as it will take a little bit of time.

Writing Adobe Color Swatch (.aco) files using C#

Getting started

The previous article described how to read files in Adobe’s Swatch File format as used by Photoshop and other high-end photo editors. In this accompanying article, I’ll describe how to write such files. I’m not going to go over the structure again, so you haven’t already done so, please read the previous article for full details on the file structure and how to read it.

Writing big-endian values

All the data in an aco file is stored in big-endian format and therefore needs to be reversed on Windows systems before writing it back into the file.

We can use the following two methods to write a short or an int respectively into a stream as a series of bytes. Of course, if you just want functions to convert these into bytes you could use similar code, just remove the bit-shift.

private void WriteInt16(Stream stream, short value)
{
  stream.WriteByte((byte)(value >> 8));
  stream.WriteByte((byte)(value >> 0));
}
 
private void WriteInt32(Stream stream, int value)
{
  stream.WriteByte((byte)((value & 0xFF000000) >> 24));
  stream.WriteByte((byte)((value & 0x00FF0000) >> 16));
  stream.WriteByte((byte)((value & 0x0000FF00) >> 8));
  stream.WriteByte((byte)((value & 0x000000FF) >> 0));
}

As with the equivalent read functions, the >> 0 shift is unnecessary but it does clarify the code.

We also need to store color swatch names, so again we’ll make use of the Encoding.BigEndianUnicode property to convert a string into a series of bytes to write out.

private void WriteString(Stream stream, string value)
{
  stream.Write(Encoding.BigEndianUnicode.GetBytes(value), 0, value.Length * 2);
}

Writing the file

When writing the file, I’m going to follow the specification’s suggestion of writing a version 1 palette (for backwards compatibility), followed by a version 2 palette (for applications that support swatch names).

using (Stream stream = File.Create(fileName))
{
  this.WritePalette(stream, palette, FileVersion.Version1, ColorSpace.Rgb);
  this.WritePalette(stream, palette, FileVersion.Version2, ColorSpace.Rgb);
}

The core save routine follows. First, we write the version of format and then the number of colors in the palette.

private void WritePalette(Stream stream, ICollection<Color> palette, FileVersion version, ColorSpace colorSpace)
{
  int swatchIndex;
 
  this.WriteInt16(stream, (short)version);
  this.WriteInt16(stream, (short)palette.Count);
 
  swatchIndex = 0;

With that done, we loop through each color, calculate the four values that comprise the color data and then write that.

If it’s a version 2 file, we also write the swatch name. As these basic examples are just using the Color class, there’s no real flexibility in names, so we cheat – if it’s a “named” color, then we use the Color.Name property. Otherwise, we generate a Swatch name.

  foreach (Color color in palette)
  {
    short value1;
    short value2;
    short value3;
    short value4;
 
    swatchIndex++;
 
    switch (colorSpace)
    {
      // Calculate color space values here!
      default:
        throw new InvalidOperationException("Color space not supported.");
    }
 
    this.WriteInt16(stream, (short)colorSpace);
    this.WriteInt16(stream, value1);
    this.WriteInt16(stream, value2);
    this.WriteInt16(stream, value3);
    this.WriteInt16(stream, value4);
 
    if (version == FileVersion.Version2)
    {
      string name;
 
      name = color.IsNamedColor ? color.Name : string.Format("Swatch {0}", swatchIndex);
 
      this.WriteInt32(stream, name.Length);
      this.WriteString(stream, name);
    }
  }
}

Converting color spaces

As previously mentioned, the specification states that each color is comprised of four values. Even if a particular color space doesn’t use all four (for example Grayscale just uses one), you still need to write the other values, typically as zero’s.

Although it’s a slight duplication, I’ll include the description table for color spaces to allow easy reference of the value types.

Id Description
0 RGB. The first three values in the color data are red, green, and blue. They are full unsigned 16-bit values as in Apple’s RGBColordata structure. Pure red = 65535, 0, 0.
7 Lab. The first three values in the color data are lightness, a chrominance, and b chrominance. Lightness is a 16-bit value from 0…10000. Chrominance components are each 16-bit values from -12800…12700. Gray values are represented by chrominance components of 0. Pure white = 10000,0,0.
1 HSB. The first three values in the color data are hue, saturation, and brightness. They are full unsigned 16-bit values as in Apple’s HSVColordata structure. Pure red = 0,65535, 65535.
8 Grayscale. The first value in the color data is the gray value, from 0…10000.
2 CMYK. The four values in the color data are cyan, magenta, yellow, and black. They are full unsigned 16-bit values. For example, pure cyan = 0,65535,65535,65535.

While supporting CMYK colors are beyond the scope of this article as they require color profiles, we can easily support RGB, HSL and Grayscale spaces.

RGB is the simplest as .NET colors are already in this format. The only thing we have to do is divide each channel by 255 as the specification uses the range 0-65535 rather than the typical 0-255.

Notice value4 is simply initialized to zero as this space only needs 3 of the 4 values.

case ColorSpace.Rgb:
  value1 = (short)(color.R * 256);
  value2 = (short)(color.G * 256);
  value3 = (short)(color.B * 256);
  value4 = 0;
  break;

We can also support HSL without too much trouble as the Color class already includes methods for extracting these values. Again, we need to do a little fiddling to change the number into the range used by the specification.

case ColorSpace.Hsb:
  value1 = (short)(color.GetHue() * 182.04);
  value2 = (short)(color.GetSaturation() * 655.35);
  value3 = (short)(color.GetBrightness() * 655.35);
  value4 = 0;
  break;

The last format we can easily support is grayscale. If the source color is already gray (i.e. the red, green and blue channels are all the same value), then we use that, otherwise we’ll average the 3 channels and use that as the value.

case ColorSpace.Grayscale:
  if (color.R == color.G &amp;&amp; color.R == color.B)
  {
    // already grayscale
    value1 = (short)(color.R * 39.0625);
  }
  else
  {
    // color is not grayscale, convert
    value1 = (short)(((color.R + color.G + color.B) / 3.0) * 39.0625);
  }
  value2 = 0;
  value3 = 0;
  value4 = 0;
  break;

Demo Application

The sample generates a random 255 color palette, then writes this to a temporary file using the specified color space. It then reads it back in, and displays both palettes side by side for comparison.

Downloads

PhotoshopColorSwatchWriter.zip 21 July 2014 78.7 KB

Reading Adobe Color Swatch (.aco) files using C#

Structure of a Photoshop color swatch file

The structure of the aco file is straightforward, helped by Adobe themselves publishing the specification which is something to appreciate. This article was created using the October 2013 edition of this specification.

According to the specification, there’s two versions of the format both of which are are fairly similar. The specification also implies that applications which support version 2 should write a version 1 palette first, which would admirably solve backwards compatibility problems. In practice this doesn’t seem to be the case, as some of the files I tested only had version 2 palettes in them.

The structure is simple. There’s a 2-byte version code, followed by 2-bytes describing the number of colors. Then, for each color, there are 10 further bytes, 2 each describing the color space and then four values to describe the color. Version two palettes also then follow this with a four byte integer describing the length of the name, then the bytes which make up said name.

Length Description
2 Version
2 Number of colors
count * 10 (+ 4 + variable (version 2 only))

Color data

Length Description
2 Color space
2 Color data value 1
2 Color data value 2
2 Color data value 3
2 Color data value 4

Version 2 only

Length Description
4 Length of name string in characters
length * 2 Unicode code characters, two bytes per character

All the data in an aco file is stored in big-endian format and therefore needs to be reversed on Windows systems.

Most color spaces only use three of the four available values, but regardless of how many are actually used, all must be specified.

Color Spaces

I mentioned above that each color has a description of what color space it belongs to. The specification defines the following color spaces:

Id Description
0 RGB.
The first three values in the color data are red, green, and blue. They are full unsigned 16-bit values as in Apple’s RGBColordata structure. Pure red = 65535, 0, 0.
1 HSB.
The first three values in the color data are hue, saturation, and brightness. They are full unsigned 16-bit values as in Apple’s HSVColordata structure. Pure red = 0,65535, 65535.
2 CMYK.
The four values in the color data are cyan, magenta, yellow, and black. They are full unsigned 16-bit values.
For example, pure cyan = 0,65535,65535,65535.
7 Lab.
The first three values in the color data are lightness, a chrominance, and b chrominance.
Lightness is a 16-bit value from 0…10000. Chrominance components are each 16-bit values from -12800…12700. Gray values are represented by chrominance components of 0. Pure white = 10000,0,0.
8 Grayscale.
The first value in the color data is the gray value, from 0…10000.

To avoid complicating matters, this article will concentrate on RGB and Grayscale color spaces, although I’ll include the basics of HSV too for if you have a conversion class kicking around.

Reading short/int data types from bytes

As I mentioned above, the values in this file format are all big-endian. As Windows uses little-endian, we need to do some bit shifting when we read each byte comprising either a short (Int16) or an int (Int32), using the following helpers:

/// <summary>
/// Reads a 16bit unsigned integer in big-endian format.
/// </summary>
/// <param name="stream">The stream to read the data from.
/// <returns>The unsigned 16bit integer cast to an <c>Int32</c>.</returns>
private int ReadInt16(Stream stream)
{
  return (stream.ReadByte() << 8) | (stream.ReadByte() << 0);
}
 
/// <summary>
/// Reads a 32bit unsigned integer in big-endian format.
/// </summary>
/// <param name="stream">The stream to read the data from.
/// <returns>The unsigned 32bit integer cast to an <c>Int32</c>.</returns>
private int ReadInt32(Stream stream)
{
  return ((byte)stream.ReadByte() << 24) | ((byte)stream.ReadByte() << 16) | ((byte)stream.ReadByte() << 8) | ((byte)stream.ReadByte() << 0);
}

The << 0 bit-shift in the above methods is technically unnecessary and can be removed. However, I find it makes the intent of the code clearer.

Reading strings

For version 2 files, we need to read a string, which is comprised of two bytes per character. Fortunately for us, the .NET Framework includes a BigEndianUnicode (MSDN) class that we can use to convert a byte array to a string. As this class does the endian conversion for us, we don’t need to do anything special when reading the bytes.

/// <summary>
/// Reads a unicode string of the specified length.
/// </summary>
/// <param name="stream">The stream to read the data from.
/// <param name="length">The number of characters in the string.
/// <returns>The string read from the stream.</returns>
private string ReadString(Stream stream, int length)
{
  byte[] buffer;
 
  buffer = new byte[length * 2];
 
  stream.Read(buffer, 0, buffer.Length);
 
  return Encoding.BigEndianUnicode.GetString(buffer);
}

Reading the file

We start off by reading the file version so we know how to process the rest of the file, or at least the first part of it. If we don’t have a version 1 or version 2 file, then we simply abort.

using (Stream stream = File.OpenRead(fileName))
{
  FileVersion version;
 
  // read the version, which occupies two bytes
  version = (FileVersion)this.ReadInt16(stream);
 
  if (version != FileVersion.Version1 && version != FileVersion.Version2)
    throw new InvalidDataException("Invalid version information.");
 
  colorPalette = this.ReadSwatches(stream, version);
  if (version == FileVersion.Version1)
  {
    version = (FileVersion)this.ReadInt16(stream);
    if (version == FileVersion.Version2)
      colorPalette = this.ReadSwatches(stream, version);
  }
}

In the above example, if a file has both versions, then I read them both (assuming the file contains version 1 followed by version 2). However, there’s no point in doing this if you aren’t going to do anything with the swatch name. For example, this demonstration program converts all the values into the standard .NET Color structure – which doesn’t allow you to set the Name property. In this scenario, clearly it’s a waste of time reading the version 2 data if you’ve just read the data from version 1. However, if you are storing the data in an object that supports the name, then it’s probably a good idea to discard the previously read data and re-read the version 2 data.

Reading color data

As the two documented file formats are almost identical, we can use the same code to handle reading the data, and then perform a little bit extra for the newer file format. The core of the code which reads the color data looks like this.

// read the number of colors, which also occupies two bytes
colorCount = this.ReadInt16(stream);
 
for (int i = 0; i < colorCount; i++)
{
  ColorSpace colorSpace;
  int value1;
  int value2;
  int value3;
  int value4;
 
  // again, two bytes for the color space
  colorSpace = (ColorSpace)(this.ReadInt16(stream));
 
  // then the four values which comprise each color
  value1 = this.ReadInt16(stream);
  value2 = this.ReadInt16(stream);
  value3 = this.ReadInt16(stream);
  value4 = this.ReadInt16(stream);
 
  // and finally, the name of the swatch (version2 only)
  if (version == FileVersion.Version2)
  {
    int length;
    string name;
 
    length = ReadInt32(stream);
    name = this.ReadString(stream, length);
  }
}

Translating the color spaces

Once we’ve read the color space and the four values of the color data, we need to process it.

The first space, RGB, is simple enough. The Adobe format is using the range 0-65535, so we just need to convert that to the standard 0-255 range:

switch (colorSpace)
{
  case ColorSpace.Rgb:
    int red;
    int green;
    int blue;
 
    red = value1 / 256; // 0-255
    green = value2 / 256; // 0-255
    blue = value3 / 256; // 0-255
 
    results.Add(Color.FromArgb(red, green, blue));
    break;

Next is HSL. How you process that depends on the class you are using, and the range of values it accepts.

case ColorSpace.Hsb:
  double hue;
  double saturation;
  double brightness;
 
  hue = value1 / 182.04; // 0-359
  saturation = value2 / 655.35; // 0-1
  brightness = value3 / 655.35; // 0-1
 
  results.Add(new HslColor(hue, saturation, brightness).ToRgbColor());
  break;

The last color space we can easily support is gray scale.

case AdobePhotoshopColorSwatchColorSpace.Grayscale:
 
  int gray;
 
  // Grayscale.
  // The first value in the color data is the gray value, from 0...10000.
  gray = (int)(value1 / 39.0625);
 
  results.Add(Color.FromArgb(gray, gray, gray));
  break;

Files using the Lab or CMYK spaces will throw an exception as these are beyond the scope of this example.

 default:
    throw new InvalidDataException(string.Format("Color space '{0}' not supported.", colorSpace));
}

Although none of the sample files I tested mixed color spaces, they were either all RGB, all Lab or all CMYK, the specification suggests that it’s at least possible. In this case, throwing an exception might not be the right idea as it could be possible to load other colors. Therefore it may be a better idea to just ignore such errors to allow any valid data to be read.

Conclusion

As you can see, reading Photoshop color swatches was quite an easy process.

You can download a fully working sample from the link below, and my next article will reverse the process to allow you to write your own aco files.

Downloads

PhotoshopColorSwatchLoader.zip 15 July 2014 76.6 KB